Installing custom body kits is one of the most rewarding modifications you can make to your vehicle. A well installed body kit can completely transform your car’s appearance, improve aerodynamics, and/or elevate its road presence. However, improper installation can lead to misalignment, paint damage, rattling parts, and long-term durability issues.
Whether you are a DIY enthusiast or planning to supervise a professional installation, understanding how to install a body kit correctly is essential. This step by step guide breaks down the entire process, from preparation to final alignment, so you can achieve a clean, professional, and long lasting result.
What Are Body Kits?
A body kit is a collection of exterior components designed to replace or enhance factory installed panels on a vehicle. These parts are engineered to change the styling, aerodynamics, and/or proportions of a car while maintaining structural integrity when installed correctly.
Typical body kit components include:
- Front bumper
- Rear bumper
- Side skirts
- Fenders
- Hood
- Rear wing or spoiler
A complete body kit includes multiple components designed to work together as a unified system. This ensures consistent styling and proper airflow across the entire vehicle.
Types of Body Kits
Understanding the different types of body kits helps you choose the right solution for your goals and budget.
1. Lip and Add-On Kits
These attach to existing factory bumpers and skirts. They’re easier to install and ideal for subtle upgrades.
2. Full Replacement Kits
These replace factory bumpers and panels entirely. They offer the most dramatic visual impact but require careful alignment.
3. Widebody Kits
Designed to increase vehicle width, these kits require cutting or modifying factory panels and are best suited for advanced installers.
4. Aero Performance Kits
Focused on airflow and downforce, these kits prioritize function along with aggressive styling.
Each type impacts body kit installation complexity, alignment tolerance, and time required.
Benefits of Installing a Body Kit
Installing a custom body kit offers more than just visual appeal.
Enhanced Appearance
A well fitted body kit gives your car a unique, aggressive, or premium look that stands out.
Improved Aerodynamics
Certain designs reduce drag, improve airflow, and increase stability at higher speeds.
Vehicle Personalization
Body kits allow you to tailor your car’s look to your style, whether track inspired or street focused.
Increased Enthusiast Value
Properly installed aftermarket parts can increase desirability among car enthusiasts.
Common Body Kit Materials
Choosing the right material affects both installation and long-term durability.
Fiberglass (FRP)
- Lightweight and affordable
- Requires prep work and test fitting
- Most common aftermarket option
Carbon Fiber
- Lightweight and premium
- Excellent fitment when manufactured correctly
- Higher cost
Polyurethane (PU)
- Flexible and impact resistant
- Ideal for daily driven vehicles
- Heavier than FRP
ABS Plastic
- OEM like finish
- Durable and consistent
- Limited availability for some models
Material choice directly impacts how you install and align custom body kits.
How to Install Body Kits: A Step-by-Step Guide
Step 1: Gather the Necessary Tools and Parts
Preparation is the foundation of a successful body kit installation.
Essential tools include:
- Socket and wrench set
- Phillips and flathead screwdrivers
- Drill and drill bits
- Jack and jack stands
- Measuring tape
- Masking tape
- Panel clips and fasteners
- Safety gloves and eye protection
Also ensure all body kit components are present and undamaged before starting.
Step 2: Remove the Existing Parts
Carefully remove factory installed bumpers, side skirts, or trim pieces.
Best practices:
- Work on a level surface
- Store OEM hardware safely
- Avoid forcing panels off
- Take reference photos during removal
This step ensures a clean slate for installing your complete body kit.
Step 3: Clean and Prep the Vehicle
Surface preparation is often overlooked but critical for proper fitment.
Preparation steps include:
- Washing mounting areas thoroughly
- Removing old adhesive or residue
- Inspecting for rust or damage
- Light sanding (for fiberglass parts)
A clean surface ensures accurate alignment and long-term durability.
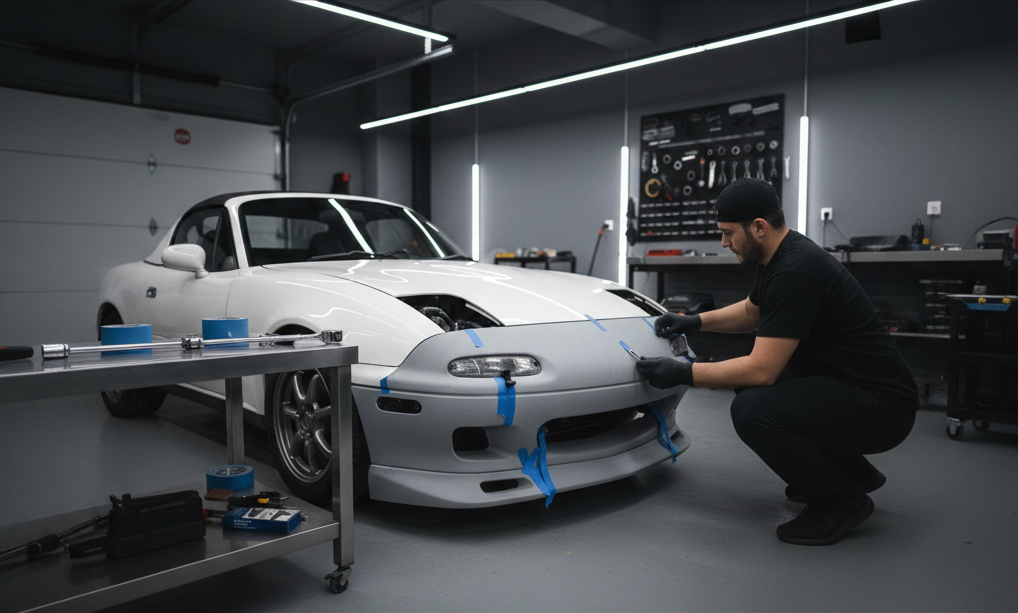
Step 4: Fit the Parts
This is the most important step in how to install a body kit correctly.
Dry fit every component before final mounting:
- Do not tighten bolts initially
- Align panel gaps evenly
- Check symmetry on both sides
- Verify door, hood, and wheel clearance
Use masking tape to mark alignment points and make adjustments slowly. Minor trimming is normal, especially with fiberglass parts.
Never force parts into position, this leads to stress cracks and misalignment.
Step 5: Secure the Parts
Once satisfied with fitment, begin final installation.
Proper securing includes:
- Gradually tightening bolts
- Using recommended fasteners
- Applying sealant where needed
- Rechecking alignment after tightening
After installation, let the vehicle sit for a few hours, then re-inspect all mounting points.
Conclusion
Installing custom body kits is a detailed process that rewards patience and precision. From choosing the right materials to careful test fitting and alignment, every step matters.
Whether you’re installing a body kit at home or working with a professional, understanding the process helps ensure a perfect fit, long lasting durability, and a finish that looks factory installed, or better.
A properly installed body kit doesn’t just change how your car looks, it elevates how it feels, performs, and stands out.
Leave a Reply