
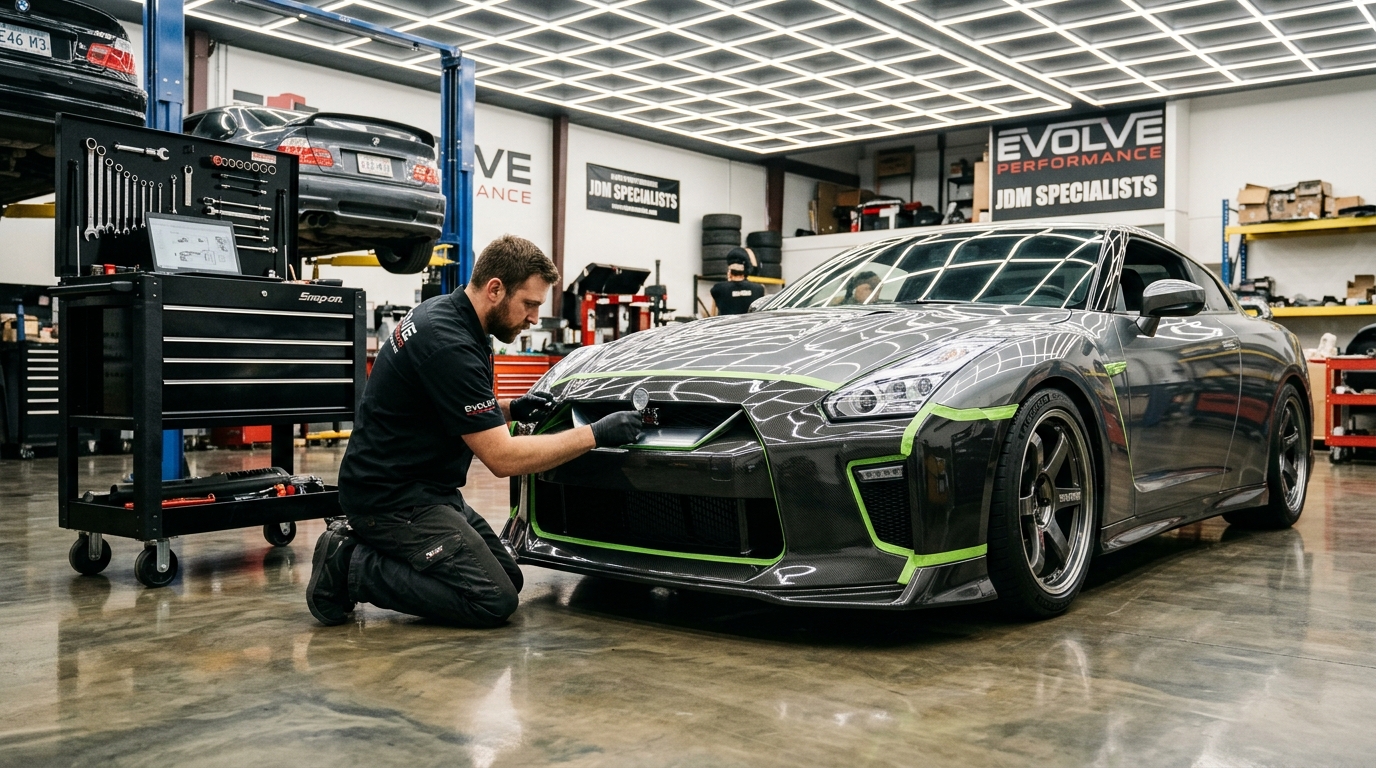
Transforming your vehicle from a stock daily driver into a head-turning, aerodynamically tuned machine is one of the most rewarding journeys in automotive enthusiasm. Investing in custom body kits allows you to radically overhaul your car’s aesthetic stance, sharpen its aerodynamic profile, and express your individual style on the street or track.
However, an aggressive front bumper or widebody flare is only as impressive as its fitment. Uneven panel gaps, warped edges, sagging side skirts, and chipped paint are common pitfalls when an install is rushed. Mastering how to install a body kit with laser-accurate alignment is what separates amateur builds from showroom-grade showstoppers. In this comprehensive, step-by-step body kit installation guide, we break down everything you need to know to achieve factory-tight tolerances and a flawless finish.
What Are Body Kits?
A body kit is a coordinated collection of aftermarket exterior components designed to alter, enhance, or replace your vehicle’s factory body panels. While standard OEM bumpers and rocker panels are engineered primarily for mass-market practicality, low manufacturing cost, and pedestrian safety regulations, custom aftermarket body kits prioritize aggressive styling, track aerodynamics, and performance functionality.
Typical components in a body kit package include:
- Front Bumpers & Lips: Redesigned front fascias featuring enlarged air intakes for intercoolers, integrated brake cooling ducts, and front splitters to manage high-speed front-axle downforce.
- Side Skirts (Rocker Panels): Extended lower panels running between the wheel wells that prevent turbulent air from rolling underneath the chassis.
- Rear Bumpers & Diffusers: Sculpted rear covers designed to accommodate single or dual performance exhaust systems and functional rear air diffusers that accelerate underbody airflow.
- Fenders & Overfenders: Vented or widened replacement panels allowing for wider track widths and aggressive wheel/tire setups.
- Spoilers & Wings: Trunk-mounted or roof-line aerodynamic wings engineered to stabilize the rear axle during cornering and high-speed braking.
Types of Body Kits
Body kits are generally divided into three major categories based on their design philosophy and installation complexity:
- Lip Kits (Add-On Splitters & Extensions): Designed for enthusiasts who love their car’s original factory lines but want a lower, more planted profile. Lip kits attach directly to the bottoms of existing OEM bumpers and side skirts using automotive-grade adhesive tape and discreet underside screws. They require minimal modification and are easily reversible.
- Full Bumper Replacement Kits: The entire front and rear factory bumper covers are unbolted and replaced with completely redesigned aftermarket units. These offer significant visual transformations and incorporate distinct styling cues, such as aggressive vents and sharp contours.
- Widebody Kits: The ultimate commitment in automotive restyling. Widebody systems replace or overlay the front and rear quarter panels, dramatically increasing the vehicle’s track width by anywhere from 30mm to over 100mm per side. Widebody installation generally requires cutting factory metal wheel arches and riveted or molded blending.
Benefits of Installing a Body Kit
Why do thousands of builders and racers invest in custom aero packages? The advantages extend well beyond simple vanity:
- Unmatched Visual Distinction: A tailored body kit eliminates the generic factory look, turning your vehicle into a bespoke representation of performance culture.
- Aerodynamic Downforce & Stability: High-performance body kits are sculpted to reduce lift at triple-digit speeds. Front air dams direct high-pressure air through coolers rather than under the chassis, while rear diffusers clean up wake turbulence to improve high-speed highway and track stability.
- Enhanced Cooling Efficiency: Aftermarket performance bumpers typically offer substantially larger duct openings, delivering direct, unhindered airflow to front-mount intercoolers (FMIC), oil coolers, and performance radiator cores.
- Tire Clearance for Wider Fitments: Wider fenders and flared arches let you run wider contact patches, lower-offset wheels, and sticky performance rubber that would otherwise rub against OEM wheel wells.
Common Body Kit Materials
The material your kit is made of dictates how it bends, how it installs, how much prep work is required before painting, and how resilient it will be against road debris and driveway scrapes. Exploring our complete body kit selections reveals four primary manufacturing materials:
- Polyurethane (PU): The gold standard for daily-driven street cars. Polyurethane is exceptionally flexible, impact-resistant, and forgiving. If a PU front lip scrapes a parking curb or steep driveway, it flexes and snaps back into shape rather than cracking. PU parts require careful heat treatment during installation to eliminate any packaging memory.
- Fiberglass (FRP / Reinforced Polymer): The most popular and accessible material across the aftermarket. Fiberglass parts are lightweight, cost-effective, and easy for body shops to modify, sand, and repair. However, fiberglass is rigid and brittle; it will not flex when scraping. Quality FRP kits like Duraflex incorporate proprietary flex-resins to improve durability.
- Carbon Fiber: The apex of motorsport aerospace engineering. Wet-lay or dry pre-preg carbon fiber offers an unbeatable strength-to-weight ratio alongside an iconic woven visual appearance. Carbon fiber components are ready to install out of the box with clear coat finishes, requiring no primer or paint unless desired.
- ABS Plastic: Similar to OEM factory bumper plastic. ABS provides excellent rigidity, heat resistance, and paint adhesion. It installs seamlessly using factory mounting tabs but can be difficult to repair if fractured.
How to Install Body Kits: A Step-by-Step Guide
Successful body kit installation is 80% preparation and test fitting, and 20% final fastening. Follow this step-by-step workflow to ensure laser-sharp panel alignment and lifelong reliability.
Step 1: Gather the Necessary Tools and Parts
Before unbolting a single screw, organize your work area. Having the proper equipment on hand ensures you don’t compromise mid-install:
- Ratchet set, extensions, and metric sockets (typically 8mm, 10mm, 12mm)
- Trim removal tool kit (nylon pry bars prevent scratching factory paint)
- Cordless drill with high-speed steel (HSS) drill bits and step bits
- Automotive masking tape (blue painters tape or automotive surface protection film)
- Spring clamps, padded C-clamps, and wooden blocks
- Heat gun (crucial for adjusting polyurethane panel memory)
- 80-grit to 320-grit wet/dry sandpaper and sanding blocks
- Stainless steel mounting hardware: M6 bolts, nylon locking nuts, large fender washers
- 3M Automotive Acrylic Plus double-sided tape (06382 or 06384) and 3M adhesion promoter (06396)
- Automotive polyurethane seam sealer or windshield urethane adhesive for permanent bonding
Step 2: Remove the Existing Parts
Park the car on level ground, engage the emergency brake, and disconnect the battery negative terminal (crucial if working near fog lights, parking sensors, or crash sensors). Carefully remove wheel well splash shields and lower undertrays to access the hidden retaining bolts securing the OEM bumpers.
Use nylon trim pry tools to pop factory plastic push-clips without snapping the retainer ears. Keep all factory fasteners organized in labeled magnetic trays—many OEM bolts and mounting brackets will be reused during the aftermarket installation.
Step 3: Clean and Prep the Vehicle
Decades of road grime, road salt, and dirt collect behind factory bumpers and inside rocker sills. Thoroughly wash the exposed metal and frame rails with automotive degreaser, rinse, and dry completely. Inspect for any hidden rust or collision damage on bumper crash beams that could throw off your new body kit’s alignment.
Apply two layers of blue automotive masking tape along the edges of the headlights, taillights, front fenders, and rear quarter panels. This protects your vehicle’s delicate clear coat while maneuvering rigid aftermarket panels into position.
Step 4: Fit the Parts
Golden Rule: Never paint an aftermarket body kit before complete test-fitting. Every hand-laid fiberglass or molded polyurethane kit requires subtle trimming, filing, or thermal contouring to match your individual vehicle chassis.
- Dry Fitting: With an assistant, lift the aftermarket bumper cover into place. Check how the upper edge meets the hood line, grille, and headlight housings.
- Heat Shaping Polyurethane: If installing polyurethane that warped during shipping, use a heat gun on medium setting to warm the curved sections evenly. Gently massage the panel into proper curvature and clamp it into position until it cools; PU will retain the corrected shape permanently.
- Trimming & Sanding Fiberglass: Use a sanding block or rotary Dremel tool with a sanding drum to shave excess gelcoat and resin along the inner flanges until panel gaps measure an even 3mm to 4mm along adjacent sheet metal.
- Drilling Pilot Holes: Mark OEM mounting hole locations onto the kit’s inner flanges with grease pencil. Drill slightly oversized pilot holes (e.g., an 8mm hole for a 6mm bolt) to allow subtle micro-adjustments during final alignment.
Step 5: Secure the Parts
Once test fitting is verified and panels are professionally painted and cured, proceed with final assembly:
- Wipe Down Mounting Surfaces: Clean mating surfaces with 70% isopropyl alcohol to strip wax and grease. Apply 3M adhesion promoter to contact flanges.
- Apply Heavy-Duty 3M Tape: Lay continuous strips of 3M Automotive Acrylic Plus tape along the inner bonding edges of side skirts and bumper lips. Peel back 2 inches of red backing liner at each corner to create “pull tabs.”
- Fasten Mechanical Hardware: Mount all bolts into the factory chassis brackets loosely. Use broad stainless fender washers on the backside of fiberglass flanges to distribute clamp load across the resin and prevent stress spidering.
- Align and Lock: Verify even gaps around headlights and fender creases. Pull the tape backing tabs while applying firm, uniform pressure along the seams. Torque all mechanical fasteners to spec, reinstall inner fender liners, and reconnect fog lamps.
Conclusion
Installing and aligning custom body kits is an art that rewards patience, meticulous measuring, and the right approach. Rushing directly to paint without dry-fitting is the single biggest mistake enthusiasts make. By methodically prepping your vehicle, test-fitting every edge, using quality fasteners, and securing your aero panels with premium automotive-grade adhesives, you ensure that your build looks immaculate from every angle and withstands the rigors of high-speed driving.
Ready to start your next styling transformation? Explore our complete inventory of vehicle-specific performance bumpers, lips, and aero upgrades at Overboost to find the perfect fit for your chassis.
FAQs
What is the average cost of body kit installation?
Professional body kit installation costs typically range from $500 to $2,500 for labor, excluding the purchase price of the kit itself. Simple lip kits and side splitters often cost $300 to $600 to install, while full bumper replacement packages requiring prep, sanding, paint matching, and blending can range between $1,200 and $2,500+. Widebody installations involving cutting sheet metal and extensive body molding generally start at $3,500 and up.
Can I install a body kit on any car model?
While custom body kits are engineered for hundreds of popular performance platforms—such as the Mazda Miata, Nissan Silvia/240SX, Toyota 86/Supra, Subaru WRX, and BMW 3-Series—they are not completely universal. Body kits are vehicle-specific and must match your car’s exact model year, trim package, and chassis generation. Universal splitters and canards can be adapted to almost any flat bumper surface with custom drilling, but full fascias must be chassis-matched.
How long does a professional body kit installation take?
For DIY installations in a home garage, expect to spend 1 to 2 full weekends (roughly 8 to 16 working hours) to thoroughly test-fit, adjust, and permanently mount a complete 4-piece kit. At a professional body shop, turnaround time is usually 3 to 7 business days, with the majority of the timeframe dedicated to prep, primer curing, base coat matching, and clear coat baking.
Are there warranties for DIY installations?
Most aftermarket aero manufacturers cover manufacturing structural defects (such as severe mold voids or delamination upon arrival before modification), but warranties explicitly void once parts are altered, drilled, cut, or painted. Damage resulting from improper DIY installation, excessive scraping, or high-speed aerodynamic detachment is generally not covered. Inspect all panels thoroughly immediately upon unboxing.
What should I do if I encounter issues during installation?
If you encounter uneven panel gaps or misaligned bolt holes, do not force or bend cold fiberglass. For polyurethane, apply gentle, distributed heat with a heat gun to coax the plastic into proper position. If a fiberglass seam is proud or tight, use a sanding block with 80-grit paper to remove excess inner material gradually. When in doubt, consult the manufacturer’s technical support or bring the dry-fitted vehicle to an experienced aftermarket body specialist before drilling permanent holes.
Leave a Reply